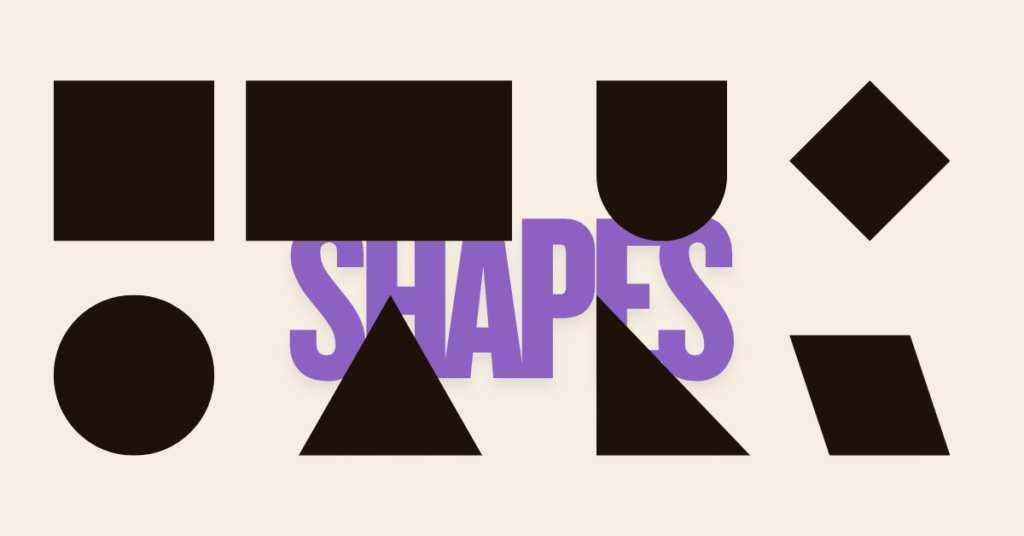
Everything in an Artwork Starts with a Shape: Forget What It Is and See It as a Shape
When we look at a face, a tree, or a cup, our minds rush to label it. We see “eye,” “leaf,” “handle”—words and meanings that come from memory. But in art, these labels can become barriers. The secret to drawing well lies in forgetting what something is and instead seeing it as pure shapes, lines, and proportions.
Why Shapes Matter in Art
Every complex subject—whether a portrait, a landscape, or an abstract piece—is built from basic shapes. The human brain processes visual information in symbols, while the artist’s eye must break those symbols down into forms: circles, triangles, rectangles, and ovals.
- A person’s head starts as an oval.
- A tree trunk is a cylinder.
- A building façade is a rectangle with subdivisions.
By recognizing these foundational shapes, you bypass the mental pressure of “getting it right” and focus on accuracy through observation.
Breaking the “Symbol Drawing” Habit
Beginners often struggle because they draw what they think something looks like, not what it really is. This is called symbol drawing—a mental shortcut based on memory. A child draws a sun as a circle with lines, regardless of how sunlight actually works. Adults do the same unknowingly.
To improve:
- Observe the outline and contour rather than assuming the form.
- Turn the subject upside down to break the association in your mind and force your brain to see abstract shapes.
- Squint at the subject to reduce detail and notice big shapes first.
How to See Like an Artist
- Simplify the Subject
Identify large, dominant shapes before focusing on details. For example, in drawing a cat, start with two overlapping shapes—a larger oval for the body and a smaller oval for the head. - Measure Relationships
Use reference lines or a pencil to check size and placement between shapes. Thinking in proportions keeps the drawing realistic. - Combine Basic Shapes
Any complex subject is a puzzle of simpler shapes fitted together. Even a human hand begins as blocky shapes before fingers are refined. - Add Details Last
Once the framework of shapes is correct, details fall into place naturally without distortion.
Practical Exercises
- Silhouette Study: Trace only the outline of objects, ignoring internal details.
- Shape Blocking: Fill a page with quick gesture drawings of objects reduced to geometric forms.
- Negative Space Awareness: Draw the space around the subject instead of the subject itself. Often, the surrounding shapes are more revealing.
From Shapes to Masterpieces
Thinking in shapes doesn’t make your work mechanical—it frees you. The bold strokes of Van Gogh’s landscapes began with underlying structural shapes. Leonardo da Vinci’s anatomical studies started with simple forms before layering complexity. Whether realism or abstraction, shapes are the launchpad for creativity.
When you forget labels and see only shapes, you let your eyes truly guide you. Art stops being a battle of “getting it right” and turns into a process of assembling pieces of a puzzle. And in that moment, you step into the mind of an artist—not someone copying reality, but someone recreating it one shape at a time.
Here’s a list of illustrated diagram ideas you can include in your blog to visually show how everyday objects break down into simple shapes. These can be created in a clean, educational style so readers can quickly grasp the concept.
Everyday Object to Shape Breakdown
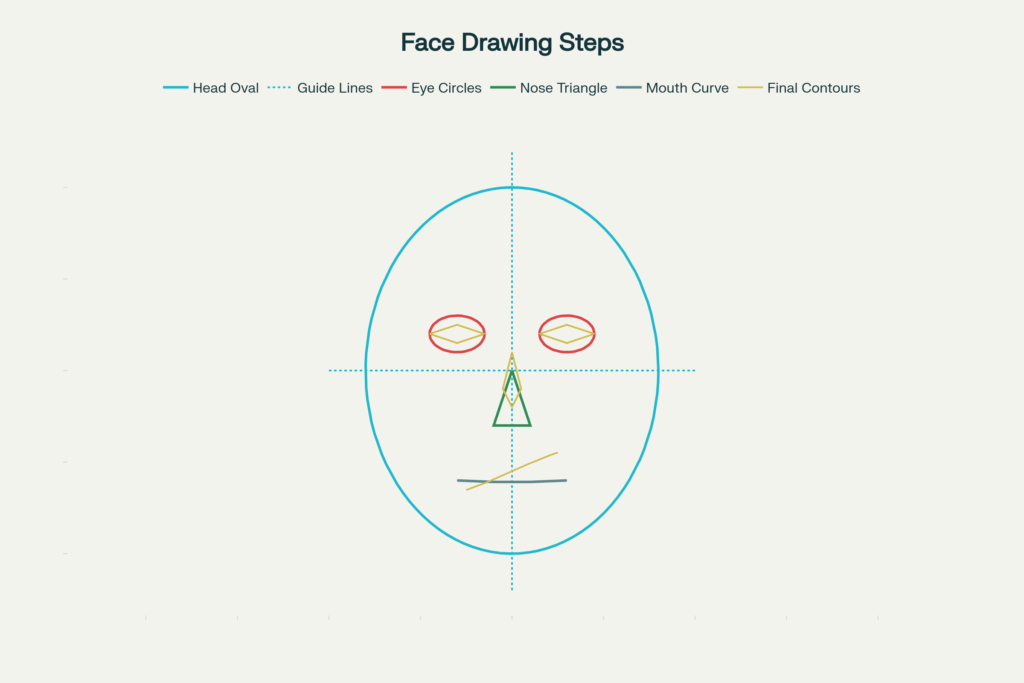
- Human Face
- Large oval for the head
- Horizontal and vertical guide lines for proportion
- Circles for eyes, triangle for nose base, curved line for mouth placement
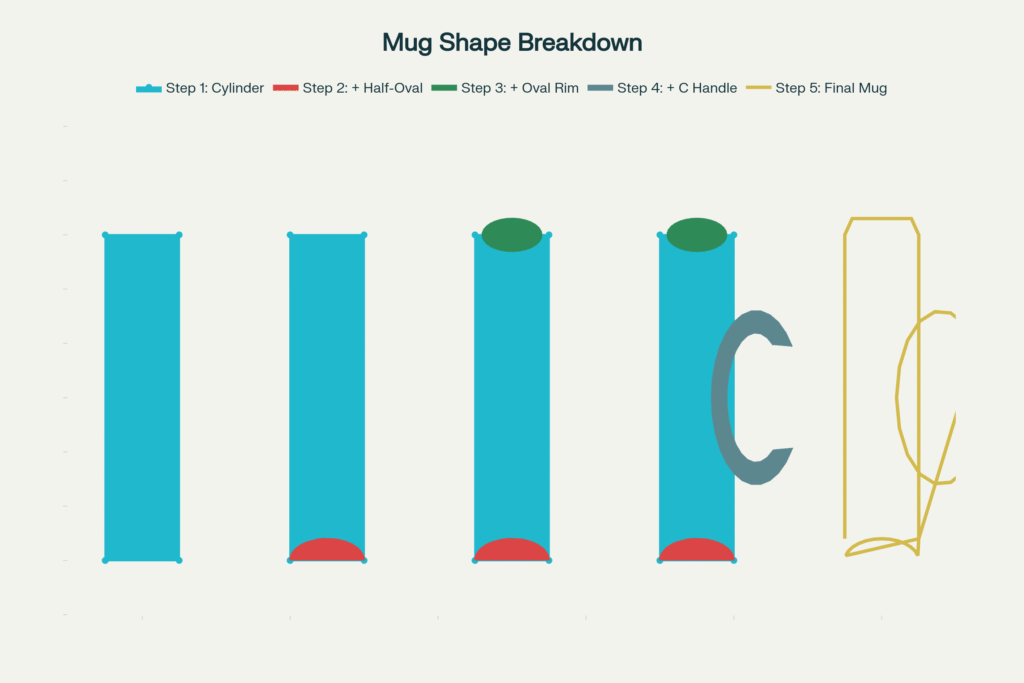
- Coffee Mug
- Main cylinder for the body
- Half oval for the base
- C-shaped curve for the handle
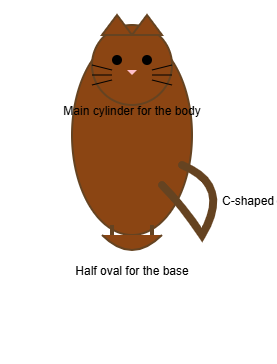
- Cat Sitting
- Large oval for torso
- Smaller oval for head
- Triangle ears, cylinder-like shapes for legs and tail
- Tree
- Cylinder for trunk
- Large irregular oval or cloud shape for leaves canopy
- House
- Rectangle for base
- Triangle for roof
- Rectangles for windows and door
Suggested Diagram Style
- Keep shapes in light grey or pastel color for clarity.
- Overlay final object line drawing on top of the shapes in a different color to show the transformation.
- Label each basic shape with its geometric name.
- Use side-by-side “Before Shape Breakdown” and “After Finished Drawing” views to make the learning process obvious.
Visual Sequence Example
Step 1: Show only geometric shapes with clear outlines.
Step 2: Add contours and curves that connect those shapes naturally.
Step 3: Show the rendered object with shading or detail.
A good visual balance would be 5–8 such diagrams placed throughout the blog to reinforce the idea that every artwork starts from these simple building blocks.
Breaking Down a Human Face Into Simple Shapes: Step-by-Step Diagram
This visual demonstrates a clear, step-by-step process:
- Start with an oval and central guide lines.
- Add geometric markers for eyes (circles), nose (triangle), and mouth (curved line).
- Overlay a simple face outline atop these building blocks, with each geometric shape labeled distinctly.
Additional diagrams for objects like a coffee mug, cat, tree, and house can be similarly created, reinforcing the lesson that every drawing begins with simple shapes. Let me know if you’d like illustrations for any other specific subjects, or a formatted set for your entire shape breakdown series.